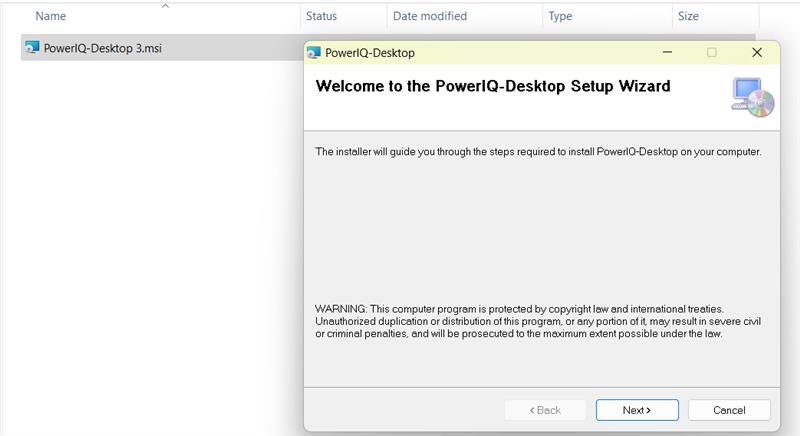
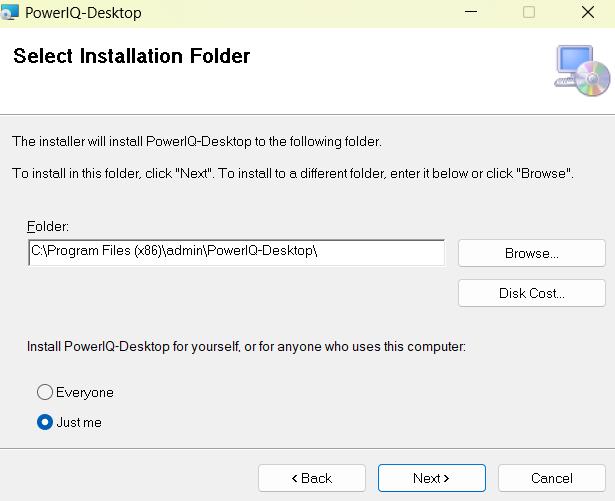
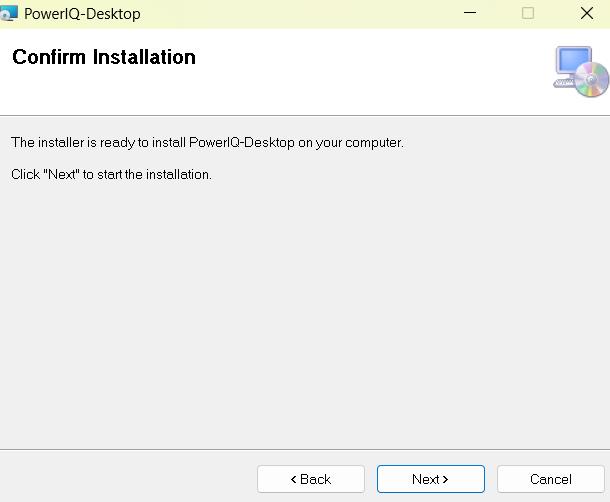
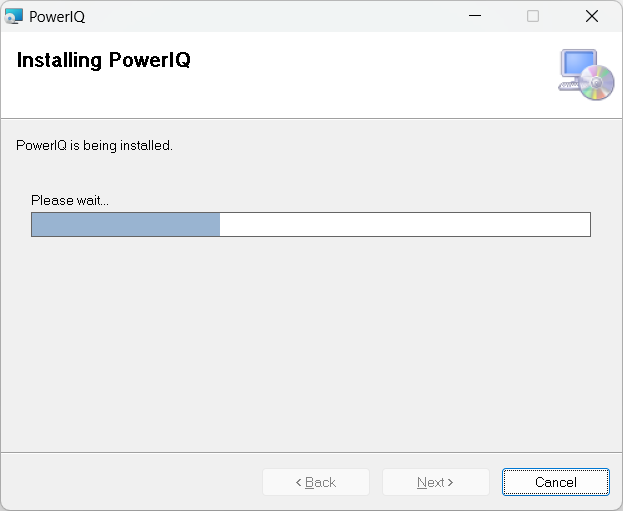
1. Installation
This document outlines the necessary prerequisites to ensure the successful installation, configuration, and operation of Power IQ. Please ensure all the specified requirements are met before proceeding with deployment to guarantee optimal performance and security.
2. System requirments
To ensure efficient application performance, the following hardware and software specifications are required:
Operating System: Windows 10 or higher.
Network: Stable internet connection (required for communication with Power BI databases).
Web Browser: Google Chrome (mandatory).
Microsoft Power BI Pro Account.
3. Technical Requirements
3.1 Azure Application
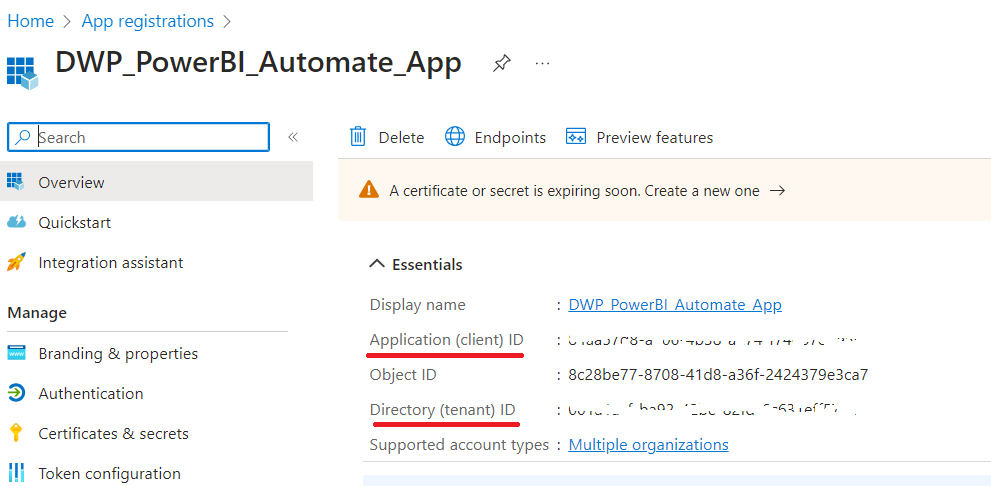
To configure Power IQ with Microsoft Azure, you must register an application with Azure Active Directory (AAD) and save the following details:
Client ID: af562%$@D543$@%^dfsa4^5#@$%
Tenant ID: af562%$@D543$@%^dfsa4^5#@$%
Client Secret Key: af562%$@D543$@%^dfsa4^5#@$%
Register an application in Azure Active Directory (AAD)
https://learn.microsoft.com/en-us/power-bi/developer/embedded/register-app?tabs=customers Step-1 login to: https://portal.azure.comstep-2: Select App Registration under +Add option.
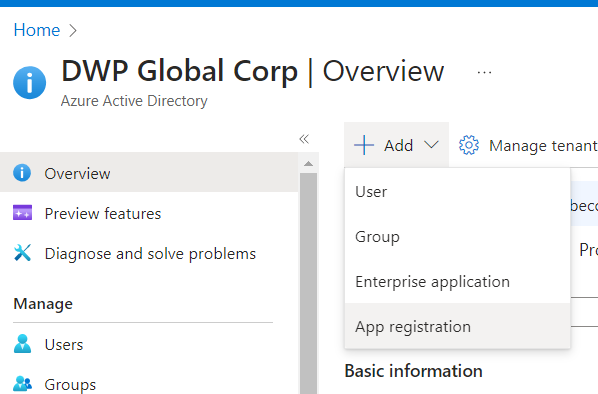
Step-3: Create an application with the required API permissions mentioned below and set the Redirect URI to http://localhost:8788/
PowerBI Service:
- Capacity.Raed.All
- Capacity.ReadWrite.All
- Content.Create
- Dashboard.Read.All
- Dashboard.ReadWrite.All
- Dataflow.Read.All
- Dataflow.ReadWrite.All
- Dataset.Read.All
- Dataset.ReadWrite.All
- Gateway.Read.All
- Pipeline.Deploy
- Pipeline.Read.All
- Pipeline.ReadWrite.All
- Report.Read.All
- Report.ReadWrite.All
- StorageAccount.Read.All
- Tenant.Read.All
- Tenant.ReadWrite.All
- UserState.ReadWrite.All
- Workspace.Read.All
- Workspace.ReadWrite.All
Microsoft Graph :
- User.Read
- User.Read.All
- UserAuthenticationMethod.Read.All
- Directory.Read.All
- Directory.AccessAsUser.All
- Directory.Write.Restricted
Power Automate :
- Activity.Read.All
- Approvals.Manage.All
- Approvals.Read.All
- Flows.Manage.All
- Flows.Read.All
- Flows.Read.Plans
- Flows.Write.Plans
- Flows.Write.Plans
- User
Step-4: Before leaving the page, note Client Secret value. As Client secret values cannot be viewed, except for immediately after creation. After creating an application navigate to Home page and click on Application count in Basic Information under Overview tab
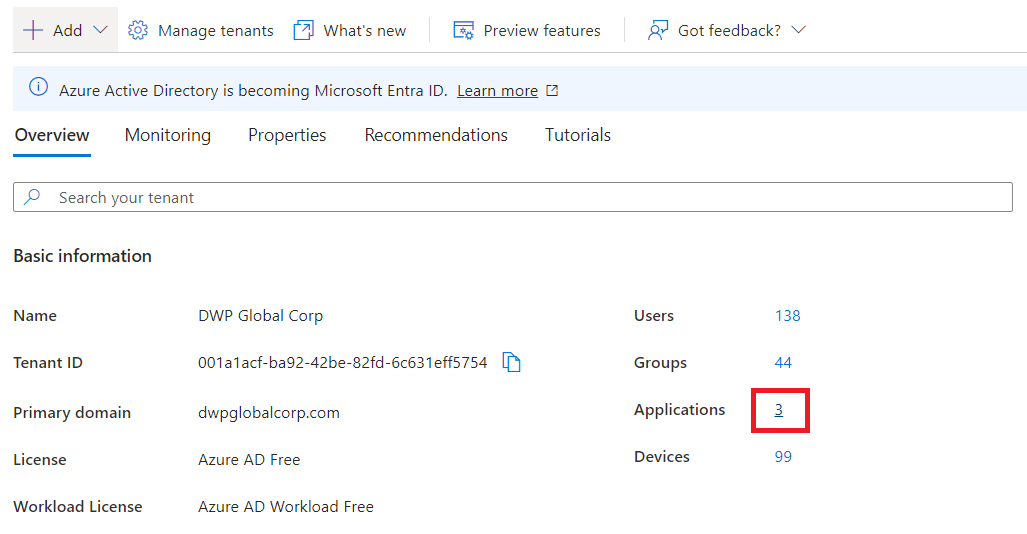
Step-5: Select the created Application under All Applications tab.
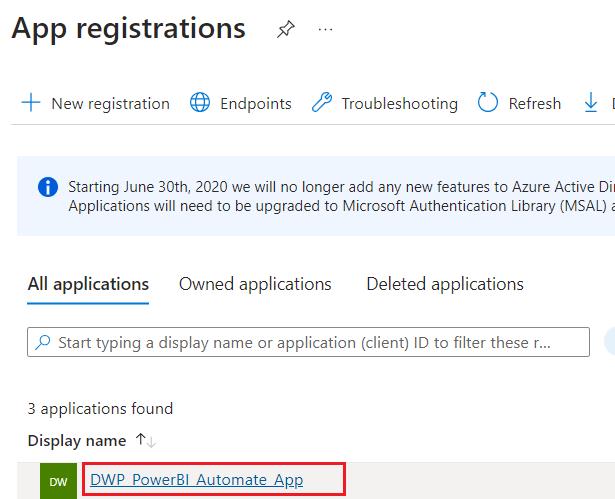
Step-6: Now save the Application (client) ID, Directory (tenant) ID from Essentials.
3.2 SMTP Configuration
In order to send alerts from Power IQ, register with an SMTP provider and provide the following details:
SMTP Host: asd-sample.mails.com
SMTP Port: 111
SMTP Username: Username
SMTP Password: Password
Create and manage your SMTP keys – Home (brevo.com)How to Install
4.Contacts and Support
For any assistance with installation, configuration, or post-installation issues, please reach out to our support team:
Support Email:poweriq-support@dwpglobalcorp.com
Notes
This document assumes all users have basic knowledge of the Azure platform and SMTP setup.
Ensure all credentials are kept secure, as they contain sensitive information that is necessary for Power IQ's integration with Azure and email notifications.
Failure to meet the system and technical requirements may lead to suboptimal performance or prevent the application from functioning as expected.
