1. Installation
1.1 Download the PowerIQ Installer
- After purchasing or receiving PowerIQ, download the installer file (.exe or .msi).
- The file will typically be saved in the "Downloads" folder unless you choose a different location.
1.2 Locate the Installer File
Open File Explorer and go to the folder where the installer was downloaded (usually "Downloads") as shown below.

1.3 Start the Installation
Double-click the PowerIQ installer file (.exe or .msi).
1.4 PowerIQ Setup Wizard
The Setup Wizard will open. Click "Next" on the welcome screen as shown below.

1.5 Choose Installation Location
- Select the folder where you want to install PowerIQ:
- Default: C:\Program Files (x86)\admin\PowerIQ-Desktop\
- Or click "Browse" to choose a different folder.
- After choosing the location, click "Next" as shown below.

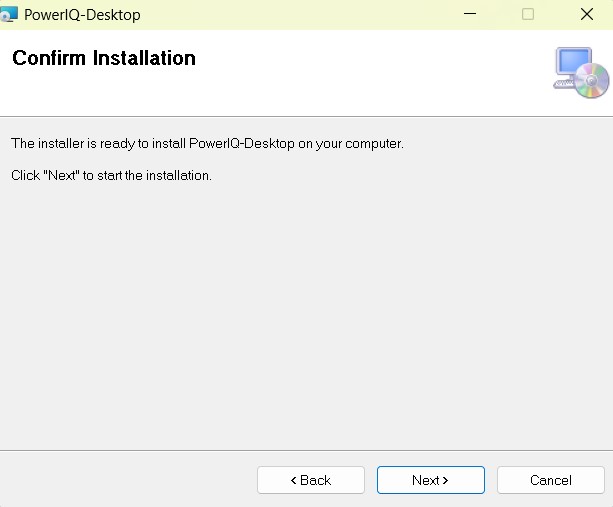
1.6 Confirm Installation
Review the installation path. If everything looks correct, click "Next" to start the installation as shown below.
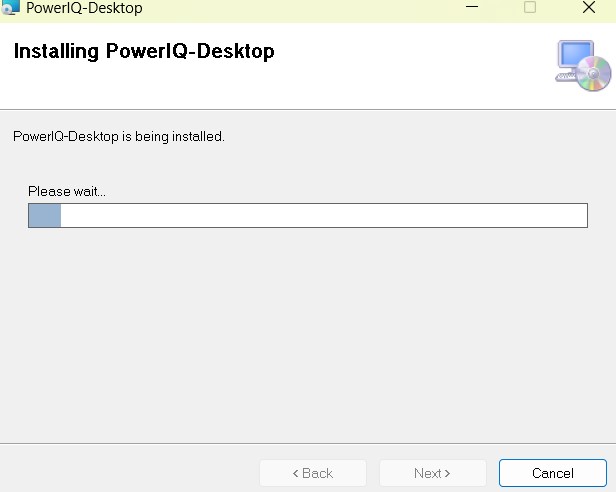
1.7 Installation Progress
The installer will copy the necessary files. This may take a few minutes as shown below.
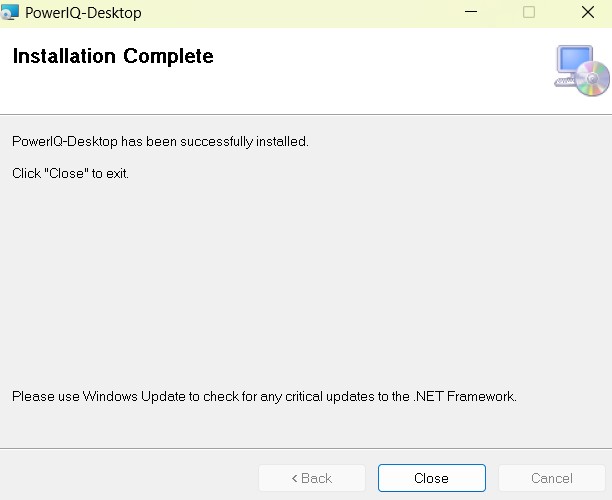
1.8 Complete Installation
When the installation is finished, click "Close" to close the Setup Wizard as shown below.
1.9 Desktop Shortcut
A shortcut for PowerIQ will appear on your desktop. If not, search for "PowerIQ" in the Start menu as shown below.

2. Launching PowerIQ
2.1 Open PowerIQ

- To open the application, double-click the desktop shortcut or find PowerIQ in the Start menu, shown below.
3. Registering and Activating PowerIQ
The application can be accessed by clicking the URL: URL yet to be updated
3.1 Registering for PowerIQ
3.1.1 Open the PowerIQ Application
After installation, double-click the PowerIQ shortcut on your desktop to open the app.
3.1.2 Login or Create a New Account
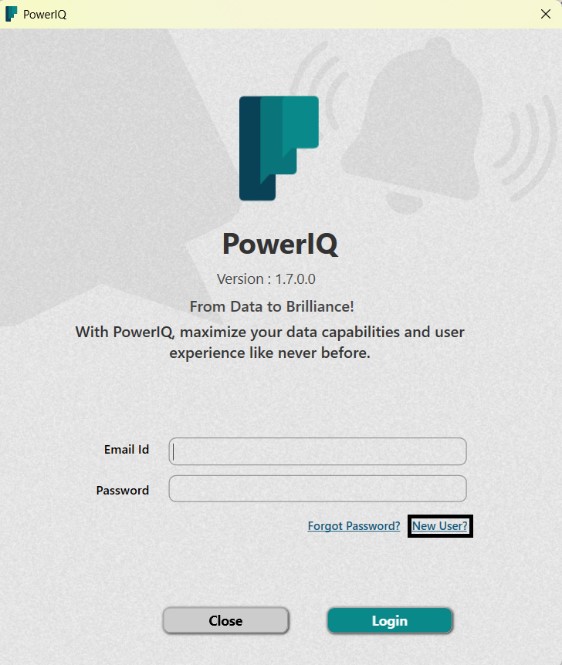
- If you already have a PowerIQ account, enter your email and password to log in.
- If you're a new user, click on the “New User” button as shown below.
3.1.3 Complete the Registration
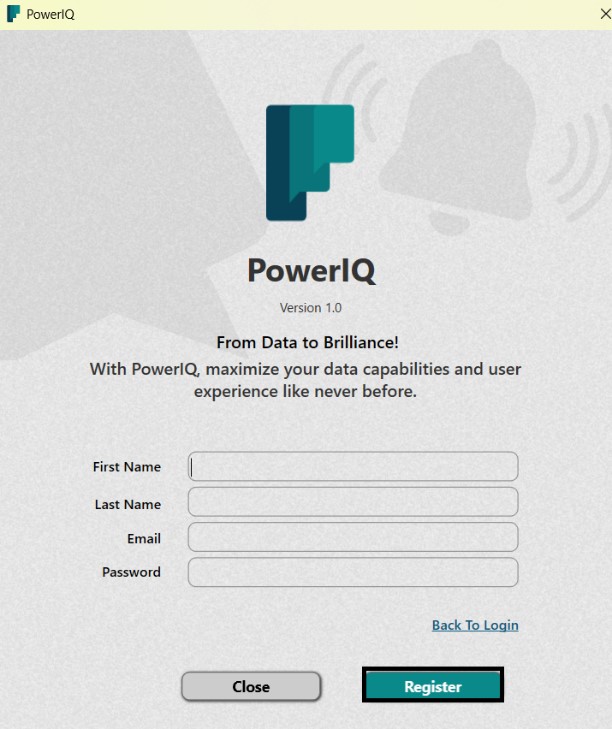
On the registration page, enter the following details:
- First Name
- Last Name
- Password
After entering your details, click the “Register” button as shown below.
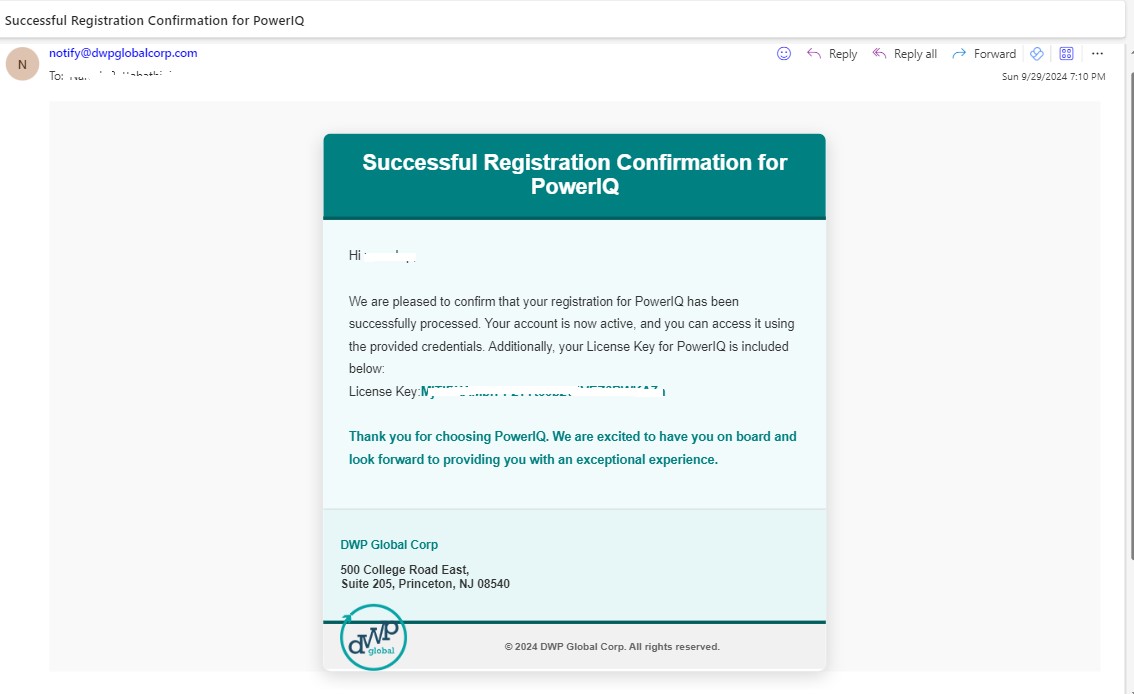
3.1.4 Check Your Email for License Key as shown below.
A message will confirm your registration
“Thank you for registering with us! Your registration for PowerIQ has been successfully completed. An email containing your License Key has been sent to your registered email address. Please check your inbox, including the spam/junk folder, to find your License Key”
As shown below.
.jpg)
After clicking “OK” on this pop-up, you will be automatically redirected to the login page.
3.2 Activating PowerIQ
Login Page
You will be directed to the login page.
- Enter Your Login Credentials
Enter the email and password you used during registration. - Enter the License Key
After logging in, you will be prompted to enter the License Key you received via email.
- Copy the License Key from your email and paste it into the required field as shown below.
- Click “Register” to activate PowerIQ.

4. Using the Best Practices Analyzer
4.1 Navigating to the Best Practices Analyzer
4.1.1 Log In to PowerIQ
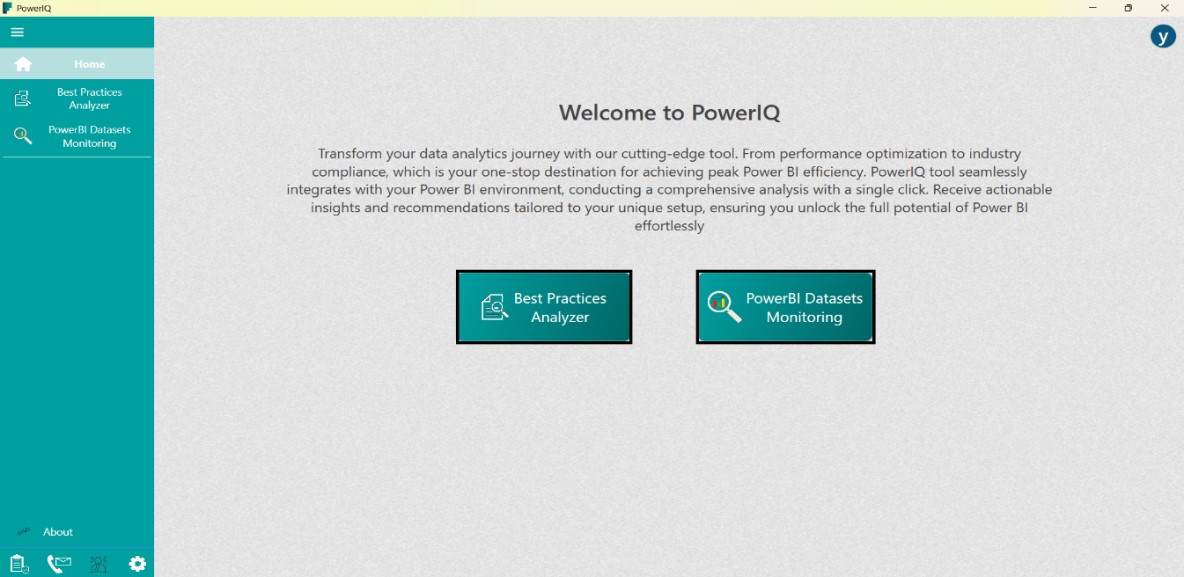
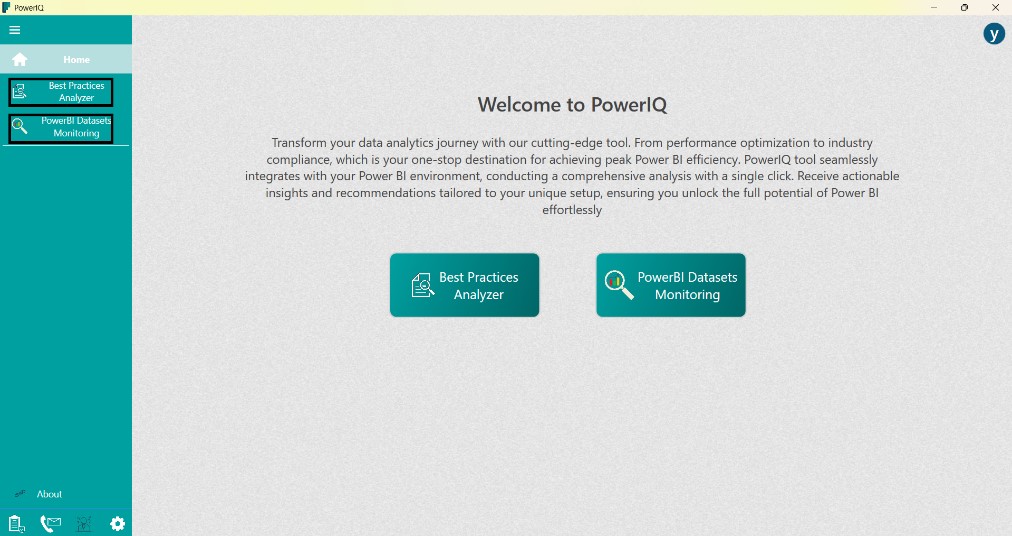
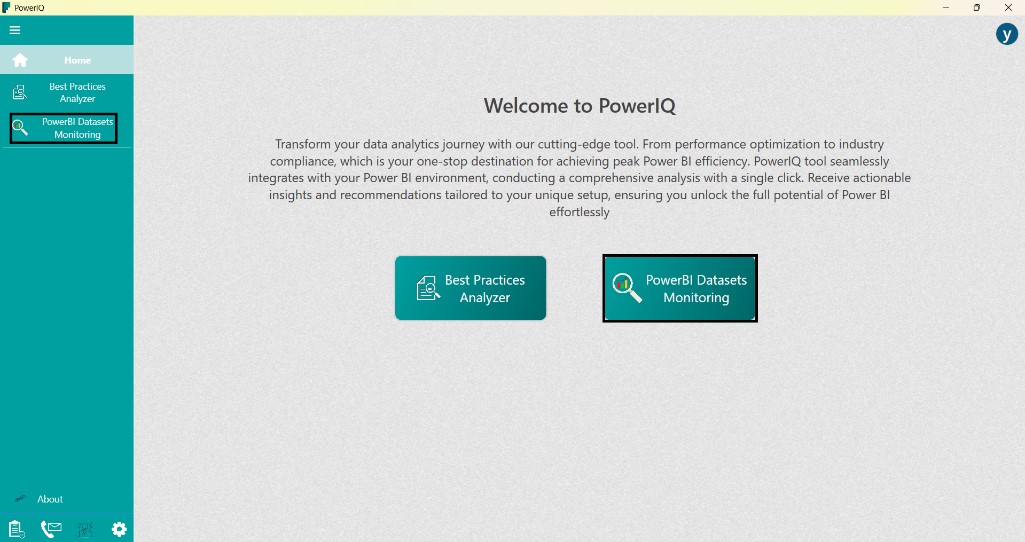
After successful login with the resisted Email and Password, you will be directed to the home screen, which has two central buttons:
- Best Practices Analyzer
- PowerBI Datasets Monitoring as shown below.
4.1.2 Selecting Best Practices Analyzer
You can navigate to the Best Practices Analyzer in two ways:
- Click the Best Practices Analyzer button in the center of the screen.
- Or select Best Practices Analyzer from the left-side panel under the Home button as shown below.
4.2 Uploading the .PBIP File
4.2.1 Preparing Your .PBIP File
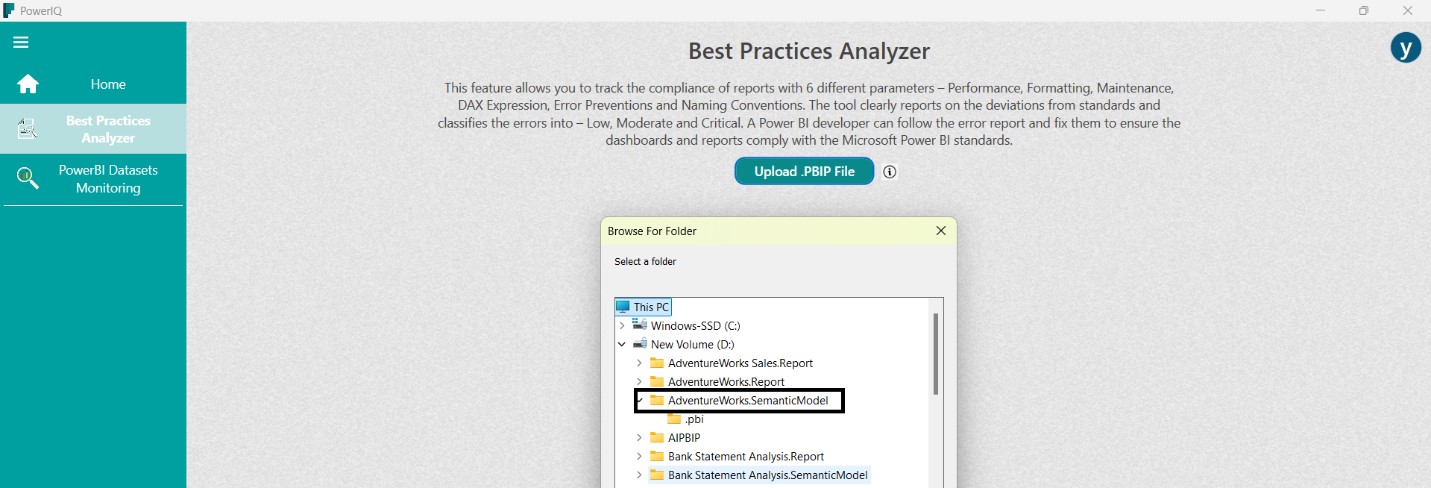
To use the Best Practices Analyzer, ensure you have the .PBIP file of the Power BI report you wish to analyze. This file will contain the .SemanticModel folder created when saving your report in .PBIP format.
4.2.2 Uploading the File
- Click the Upload .PBIP File button at the top right of the screen.
- A file browser window will open. Navigate to the location of your .PBIP file and select it as shown below.
4.2.3 Using the Tour Guide
If you're unsure how to upload a .PBIP file, click the Tour Guide Icon.
- This guide will walk you through the steps of uploading a .PBIP file, making the process easy to understand.
4.2.4 View the Analysis
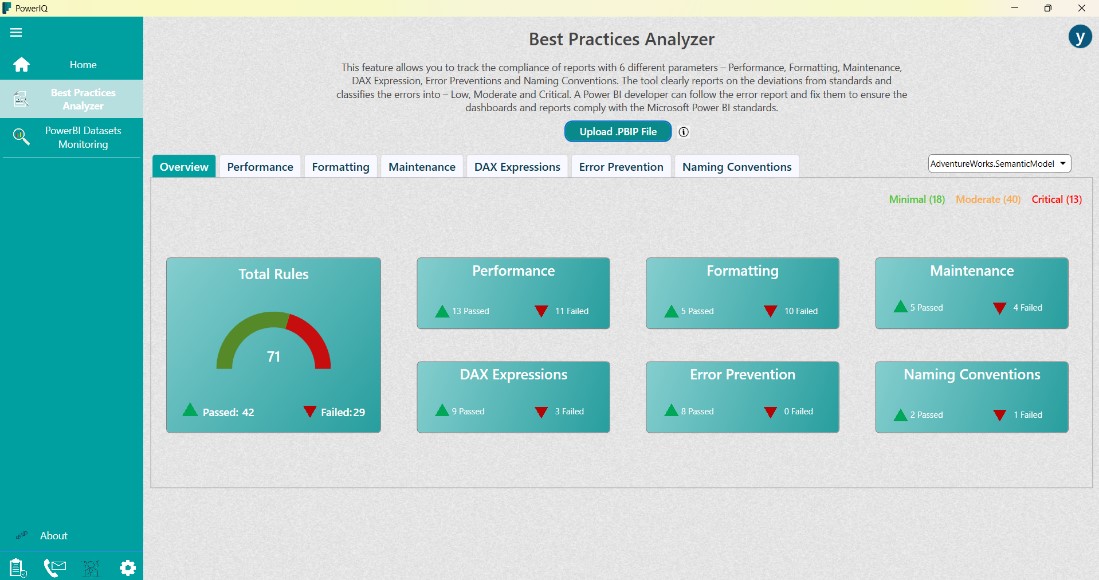
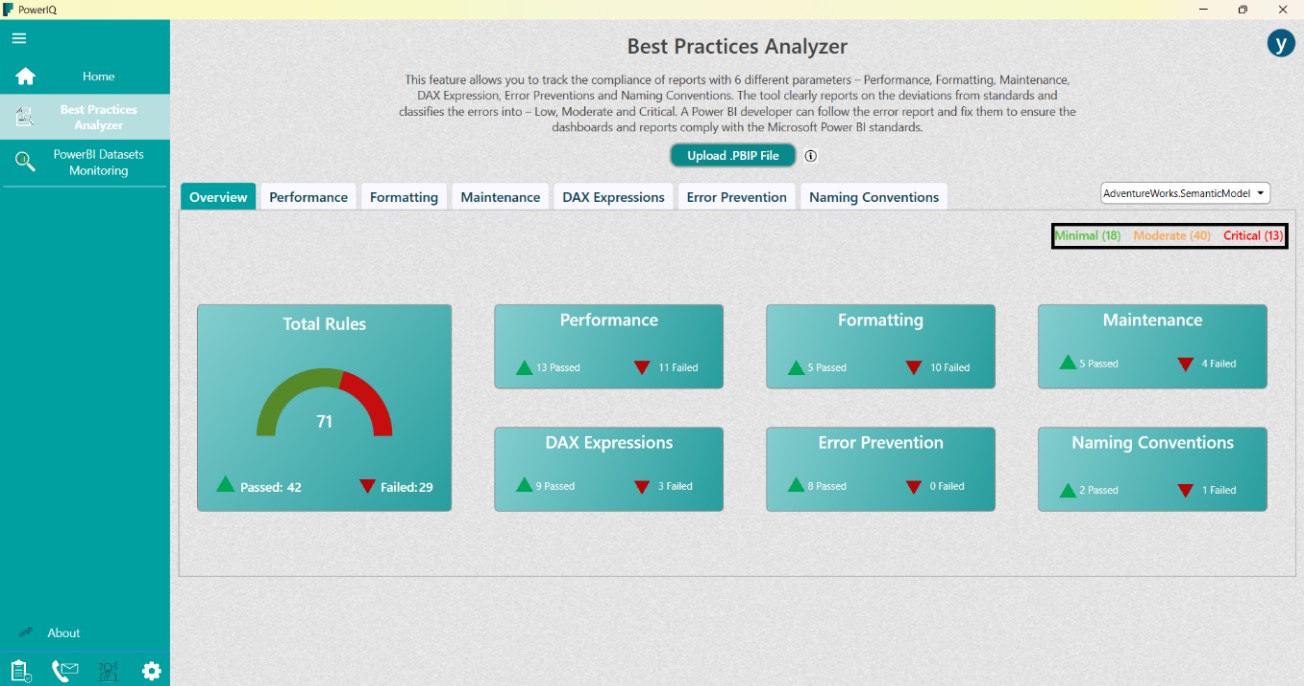
Once the file is uploaded, the tool will analyze the report based on Microsoft's 71 best practice rules.
- You will see the results displayed in the Overview tab, categorized as Passed and Failed as shown below.
4.3 Exploring the Rule Categories
4.3.1 Understanding Rule Categories
The 71 rules are divided into the following categories:
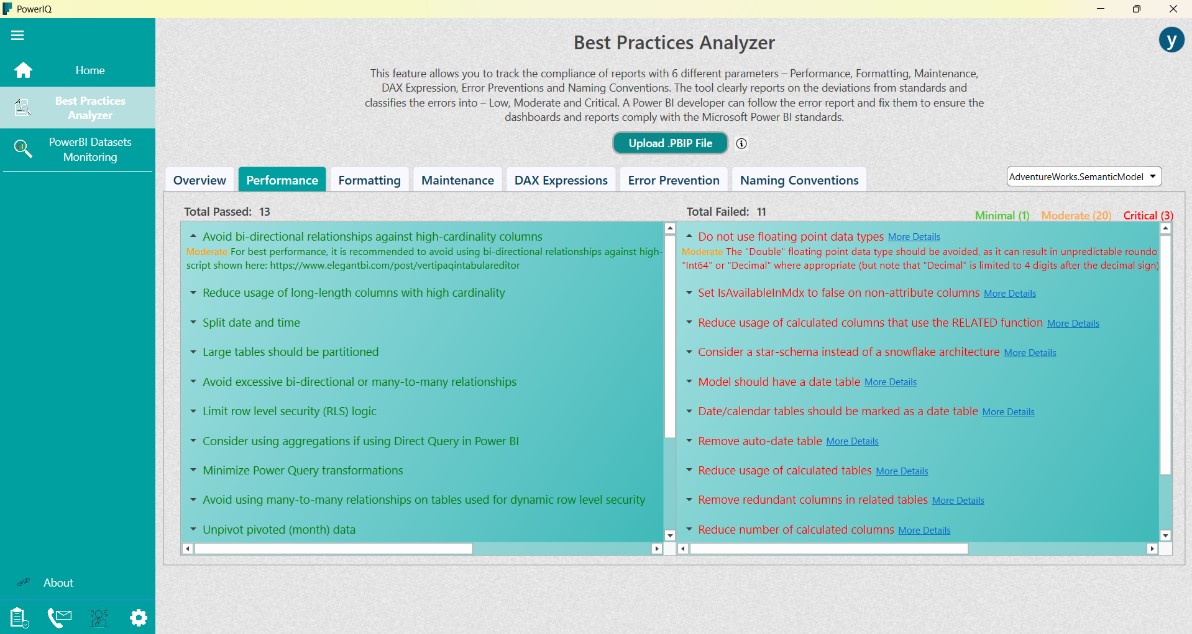
- Performance: Evaluates how efficiently the report is designed to minimize resource use and enhance speed as shown below.
- Formatting: Checks for consistency and readability in formatting, such as text alignment, number formats, and capitalization as shown below.
.jpg)
- Maintenance: Ensures the report is structured for easy updates and long-term management.
.jpg)
- DAX Expressions Assesses the efficiency and accuracy of DAX formulas used in calculations.
.jpg)
- Error Prevention: Identifies potential issues that could lead to errors, such as incorrect data types or missing relationships.
.jpg)
- Naming Conventions: Ensures that objects like columns, measures, and tables are named clearly and consistently to improve understanding.
.jpg)
4.3.2 Viewing Detailed Rule Analysis
For each category, the rules are further classified as Minimal, Moderate, and Critical based on their impact.
- You can click More Details next to any rule to get a deeper explanation of the issue and suggestions on how to resolve it.
4.3.3 Analyzing Multiple Files
- If needed, you can upload more than one .PBIP file to analyze multiple reports simultaneously.
5. Using the Power BI Datasets Monitoring
5.1 Navigating to Power BI Datasets Monitoring
5.1.1 Accessing Power BI Datasets Monitoring
- From the Home screen, click the Power BI Datasets Monitoring button at the center.
- Alternatively, you can click Power BI Datasets Monitoring from the left-side panel under the Home button.
5.1.2 Navigating to Power BI Login
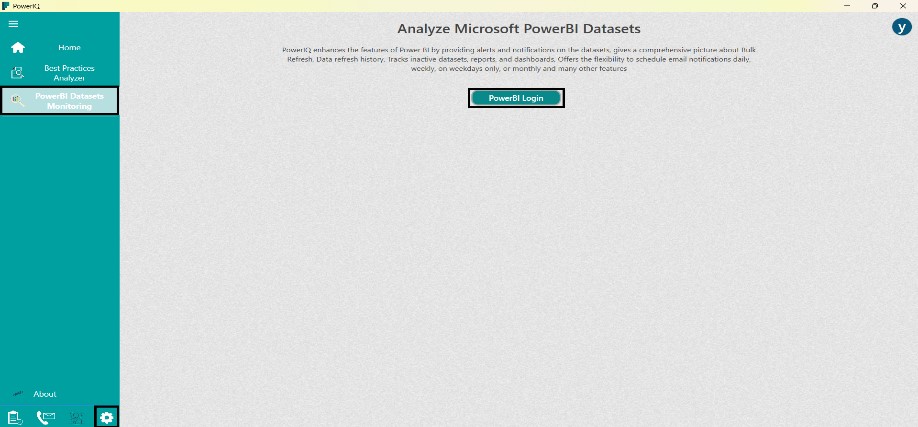
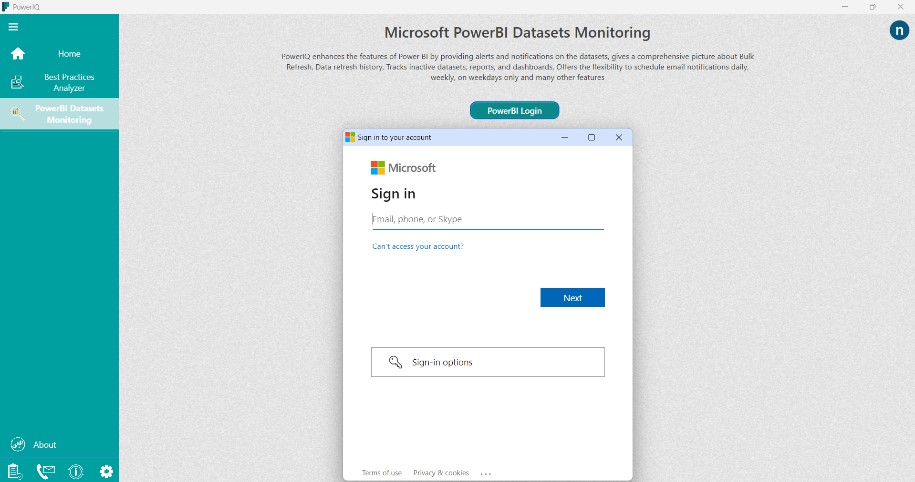
Once you are on the Power BI Datasets Monitoring screen, click the Power BI Login button.
- A pop-up message will appear instructing you to configure authentication and SMTP details before accessing datasets.
5.2 Configuring Authentication and SMTP Settings
5.2.1 Opening the Configuration Screen
- To configure the necessary settings, click the Settings button at the bottom-left corner of the screen.
5.2.2 Filling in Authentication Details
On the configuration screen, you need to provide the following details under the Authentication section:
5.2.3 Registering an Application in Azure Active Directory (AAD)
Why Register with AAD?
To connect PowerIQ with your Power BI datasets, you need to provide the Client ID, Tenant ID, and Client Secret. These are obtained by registering an application in Azure Active Directory (AAD).
Reference - Azure Active Directory Registration for an Application doc
5.2.4 Providing SMTP Details
In the SMTP Configuration section, fill in the required details for email notifications:
- SMTP Host: The address of your SMTP server.
- SMTP Port: The port used for SMTP communication.
- SMTP Username: Your SMTP account username.
- SMTP Password: The password for your SMTP account.
Reference - Create and manage your SMTP keys – Home (brevo.com)
6. Setting Gateway Threshold
- In the Gateway Threshold section, specify the acceptable time limit for dataset refresh processes.
7. Saving Configuration
- After completing all fields, click the Save Data button to save your configuration.

8. Login
Once the user provides the required details, they can click on the Power BI login button in order to access their Microsoft PowerBI Data.
9. Dashboard
Upon successful login, users gain access to additional tabs within the application, including Dataset Details, Report Details, Gateway Details, and Dashboard Details. Users can select a workspace from the dropdown list of workspaces and view corresponding data in the tabs.
.jpg)
.jpg)
.jpg)
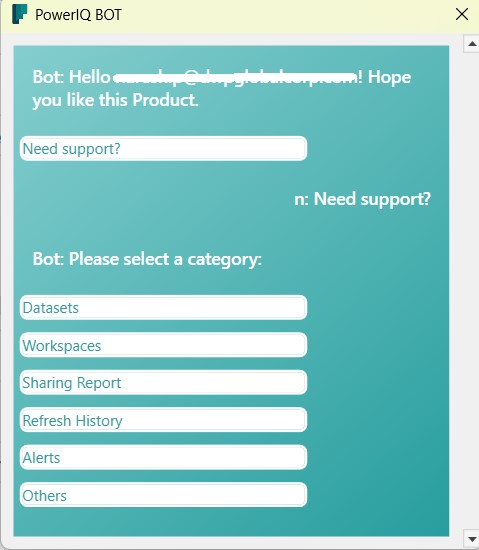
10. PowerIQ BOT
Our PowerIQ BOT assists users in resolving the issues they encounter and facilitates communication with us on their behalf.
